Server Installation
Prerequisite
Casvisor server uses Casdoor as the authentication and authorization system. So you need to install Casdoor first. If you haven't installed Casdoor, please refer to Casdoor Installation.
Casdoor
You have installed Casdoor, now you need to do some necessary configuration in Casdoor in order to use Casvisor.
Create an organization
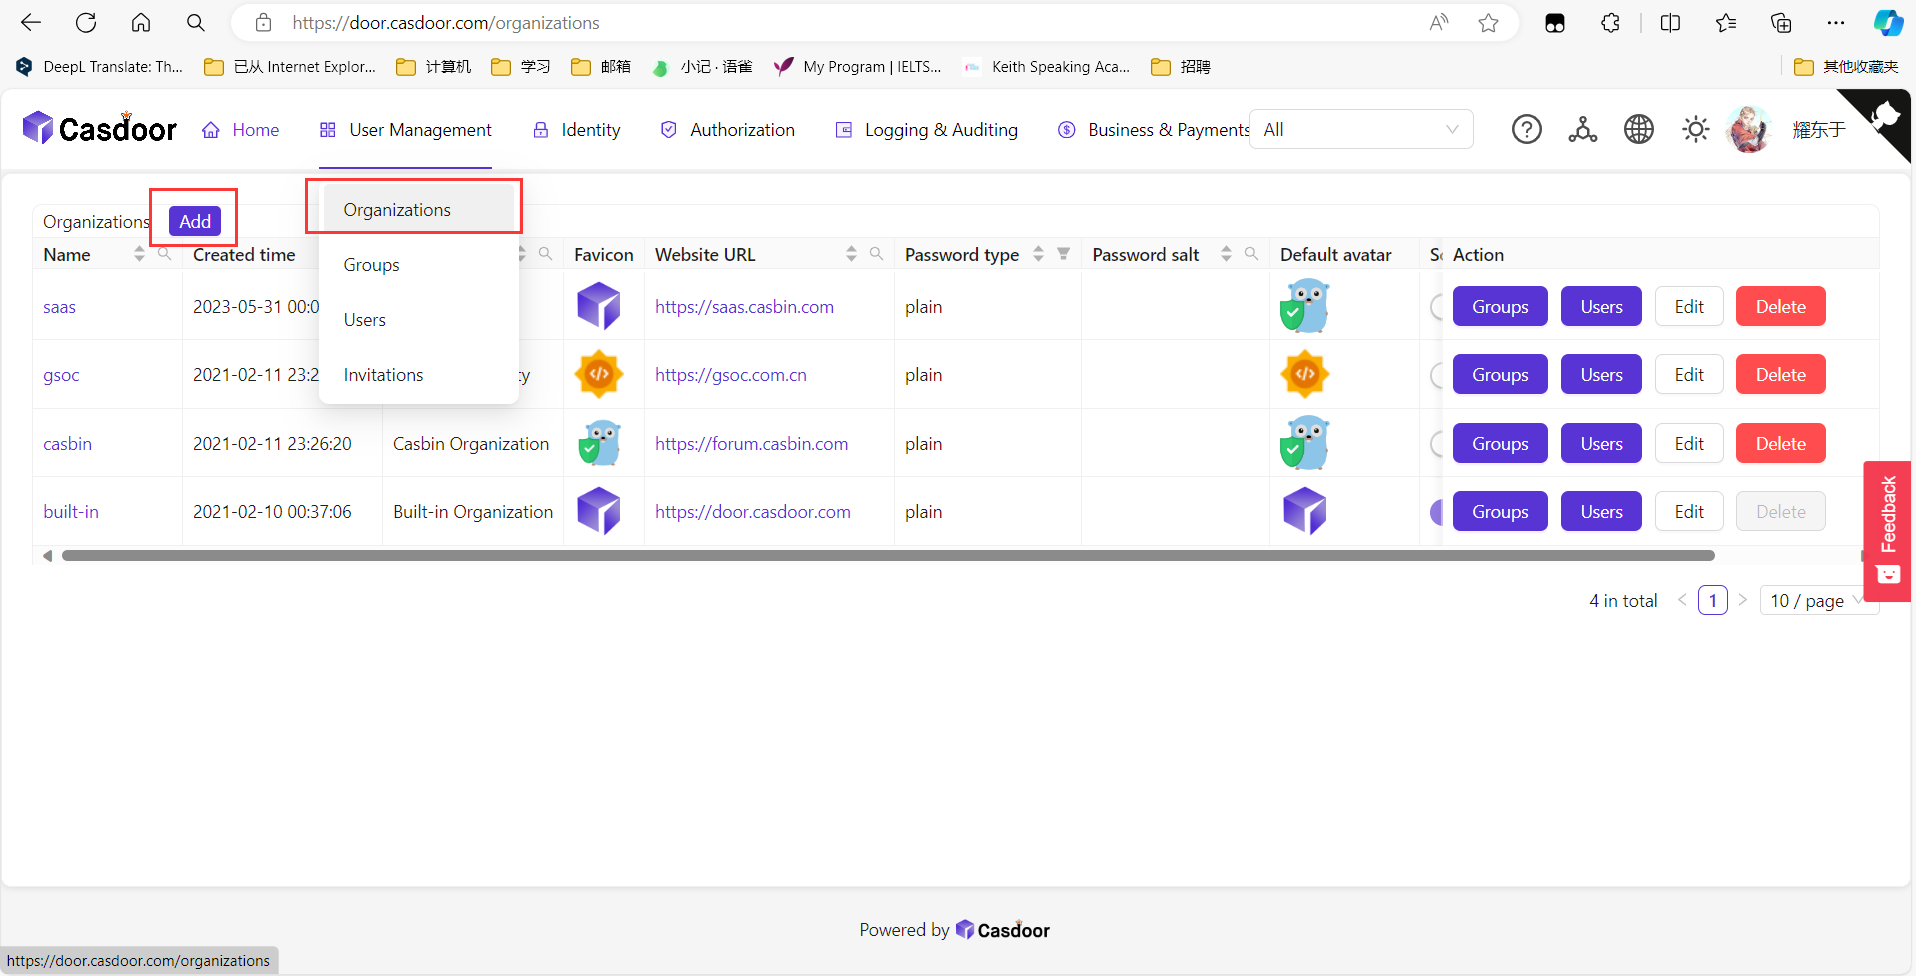
First, you need to create an organization (Except for the build-in) in Casdoor. The organization page is at User Management -> Organizations.
And you can create an organization by clicking the add button.

Create an application
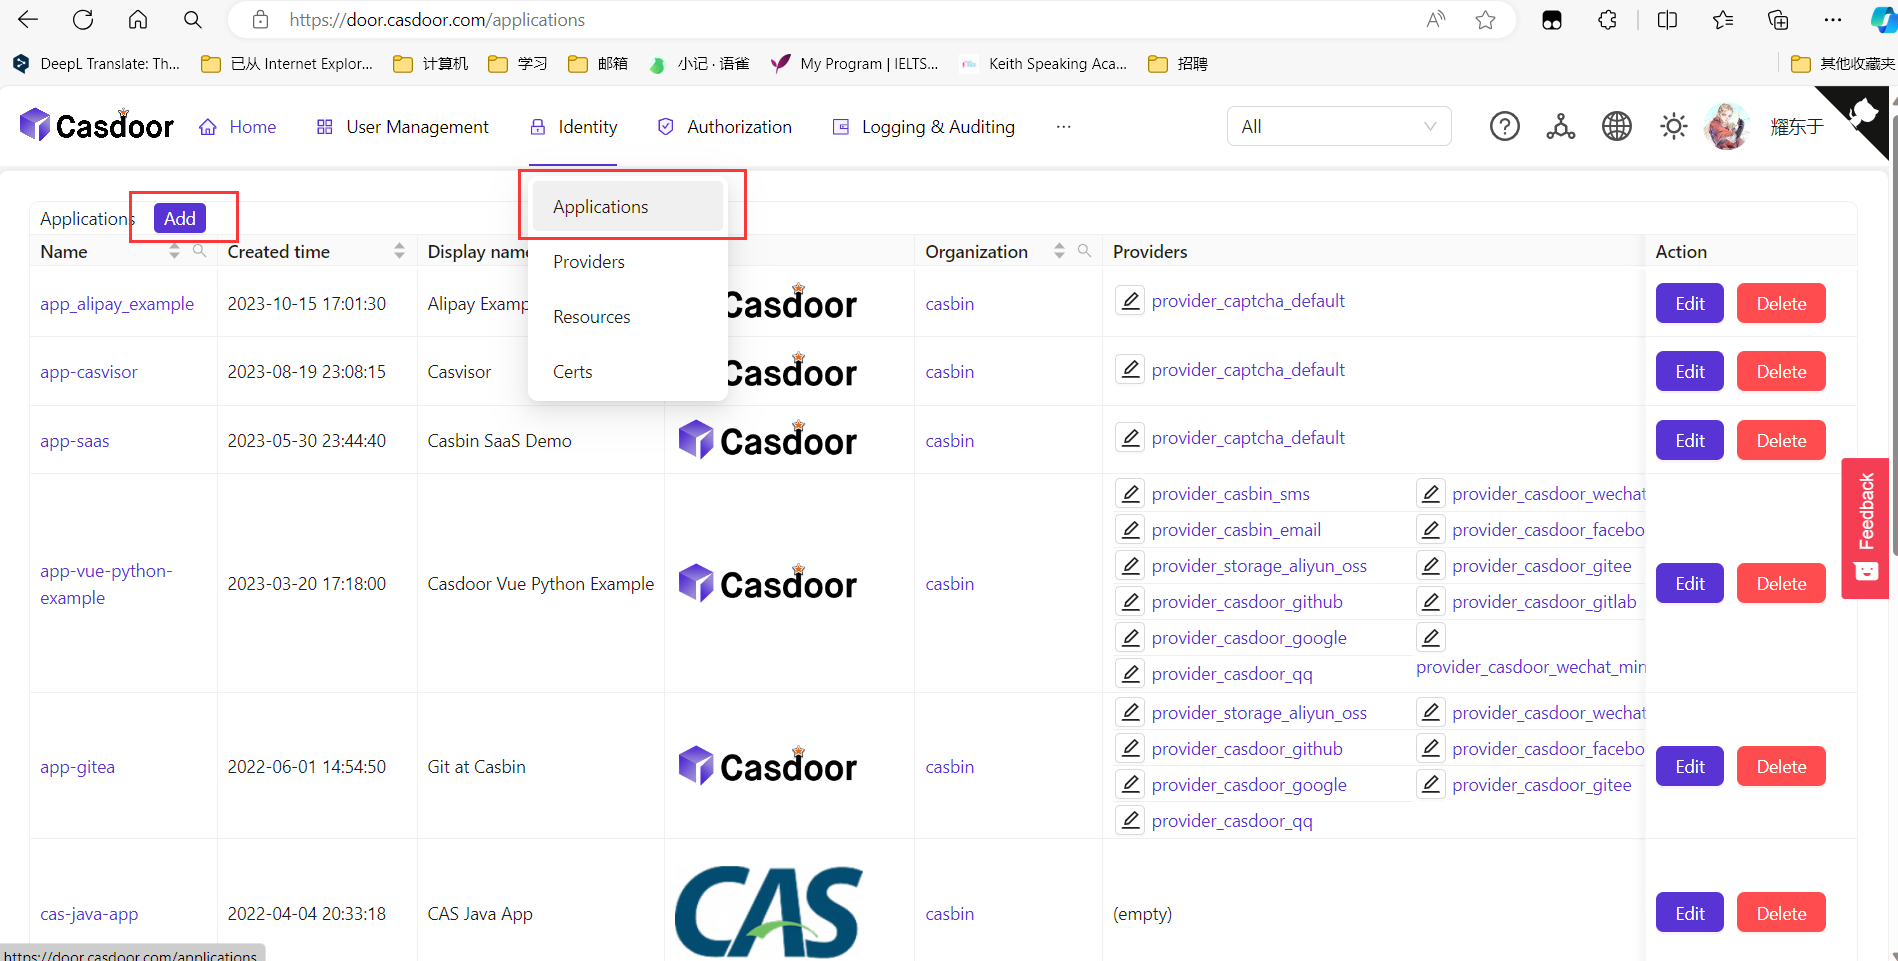
You need to create an application for Casvisor in Casdoor. The application page is at Identity -> Applications. And you
can create an application by clicking the add button.

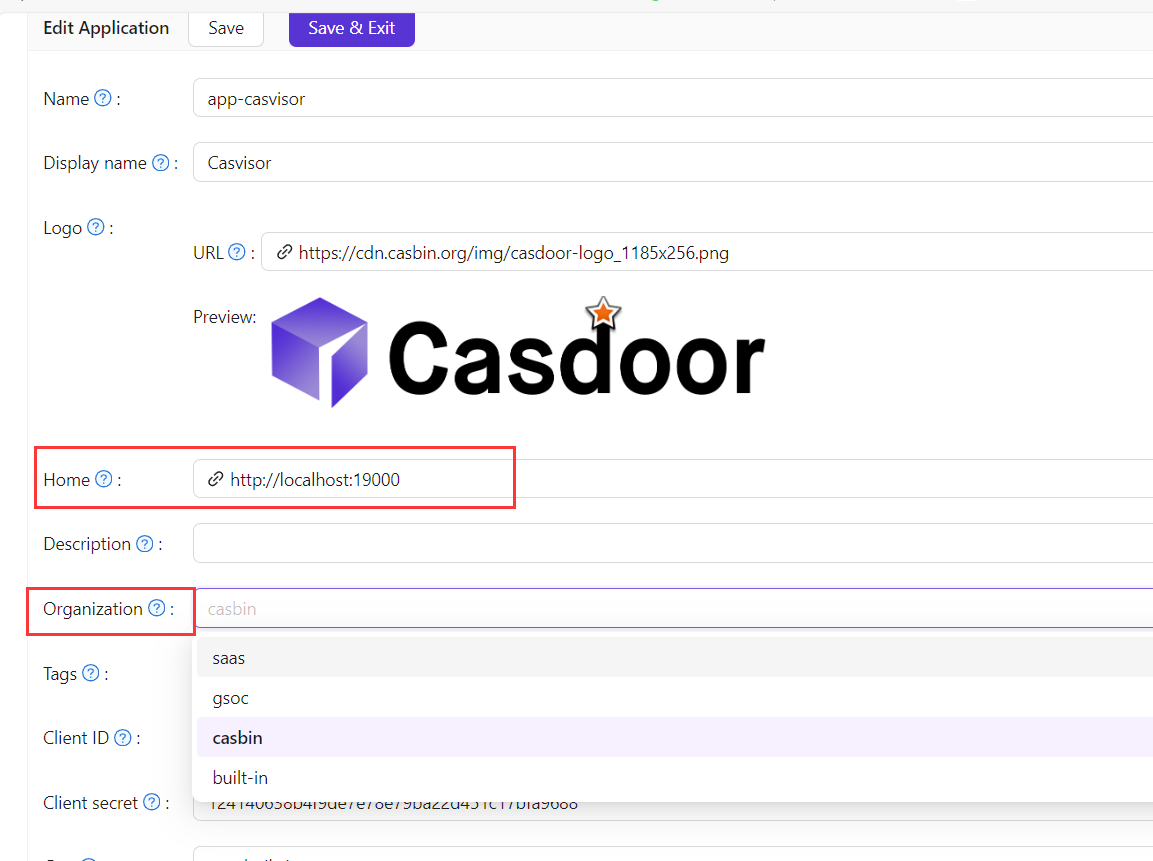
Required fields:
Home: The host of Casvisor server, e.g.http://localhost:16001.Ognization: The organization you created in the previous step.Callback URLs: The callback URL of Casvisor server, e.g.http://localhost:16001/callback. You can add multiple callback URLs by clicking theaddbutton. These are the urls that is allowed to be redirected after login.

guacd
Casvisor uses guacamole-server to provide remote desktop access. If you want to use this feature, you need to install guacamole-server first. If you haven't installed guacamole-server, please refer to guacamole-server Installation.
You can also run guacd in docker with the following command:
docker run -d --name guacd -p 4822:4822 guacamole/guacd
Download
The source code of Casvisor is hosted on GitHub: https://github.com/casvisor/casvisor. Both the Go backend code and React frontend code are contained in a single repository.
| Name | Description | Language | Source code |
|---|---|---|---|
| Frontend | Web frontend UI for Casdoor | JavaScript + React | https://github.com/casvisor/casvisor/tree/master/web |
| Backend | RESTful API backend for Casdoor | Golang + Beego + XORM | https://github.com/casvisor/casvisor |
Casvisor supports Go Modules. To download the code, simply clone the code using git:
git clone https://github.com/casvisor/casvisor
Configuration
Backend
The configuration file of Casvisor backend located at conf/app.conf. You need to modify the following fields:
Database
Modify dataSourceName to your own database connection string. Casvisor will create a database named casvisor if it doesn't exist.
driverName = mysql
dataSourceName = root:123456@tcp(localhost:3306)/
dbName = casvisor
Connect Casdoor
Modify casdoorEndpoint, clientID, clientSecret, casdoorOrganization and casdoorApplication to your own Casdoor configuration.
You can get the clientID and clientSecret from the application page that you created in the previous step.
casdoorEndpoint = http://localhost:8000
clientId = c34fdf145f41313727a8
clientSecret = 615c503d4552d24a40360cf908b6d17e3b7f8832
casdoorOrganization = "casbin"
casdoorApplication = "app-casvisor"
Frontend
In web/src/conf.js, you need to modify the following fields:
    export const AuthConfig = {
    serverUrl: "http://localhost:8000",
    clientId: "c34fdf145f4131b727a8",
    appName: "app-casvisor",
    organizationName: "casbin",
    redirectPath: "/callback",
};
Run
Before running Casvisor, make sure Casdoor is running.
Production
In production, you need to build the frontend code first, then run the backend code.
Build frontend
cd web
yarn install
yarn build
After building successfully, the frontend bundle will be generated in web/build directory.
Run backend
go build
Visit backend server at http://localhost:19000.
Nginx
If you use nginx as a reverse proxy, you need to add the following configuration to the nginx configuration file:
location / {
    *** your configuration ***
    proxy_set_header Upgrade $http_upgrade;
    proxy_set_header Connection "upgrade";
}
Because Casvisor uses websocket to communicate with guacd.
Development
In development, you need to run the frontend code and backend code at the same time.
Run frontend
cd web
yarn install
yarn start
Run backend
go build
Visit frontend server http://localhost:16001.